
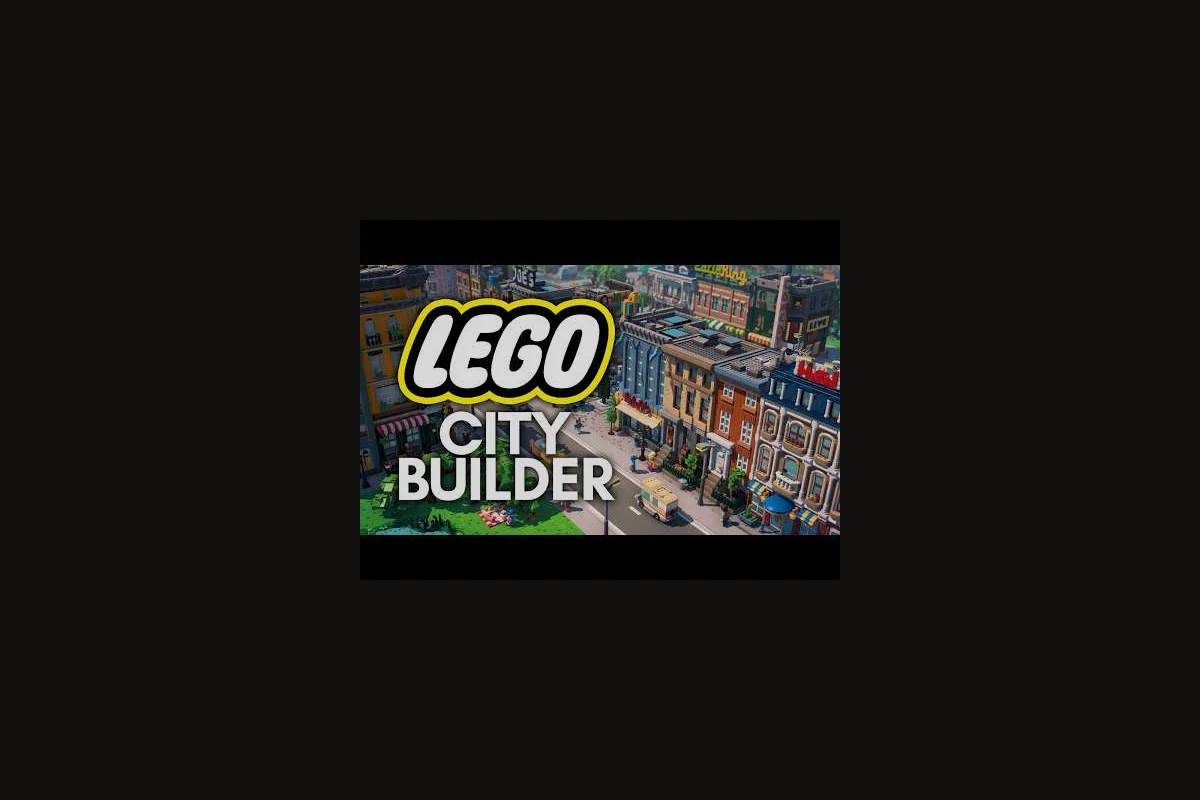
A strong LEGO Skylines building guide starts with one simple truth: the catalogue of bricks, roofs, signs, and decorative props is the real personality of your city. Every block you place shapes how citizens move, how parks frame homes, and how your skyline reads from a screenshot. The official LEGO Skylines on Steam listing already confirms that the game ships with a large catalogue of buildings and decorations, so the way you lay them out is what separates a quiet starter town from a memorable brick metropolis.
Understanding the Building System in LEGO Skylines
Before placing a single wall plate, you need to grasp how the building tools in LEGO Skylines actually behave. The game is a cozy, customizable city-builder from Iceflake Studios and Paradox Interactive, where you manage electricity, food, water, housing, jobs, healthcare, parks, shops, waste collection, and sewage while also deciding what every neighborhood looks like. That visual side is not a separate mode — your decorative buildings and structural pieces sit on the same grid as the functional service buildings, which is why planning the building layout matters as much as zoning.
Core Building Categories
The official store page and the LEGO Skylines on Paradox Interactive page both list the same broad set of structures: homes, workplaces, parks, donut shops, and a long tail of decorative props. Once you start playing, that list expands into a richer taxonomy that you can group into four practical buckets:
| Category | What It Covers | Role in the City | Example Pieces |
|---|---|---|---|
| Residential | Small, medium, and tall homes | Houses citizens, generates tax income | Townhouse, Mid-High Apartment |
| Service | Power, water, healthcare, waste | Keeps the simulation running | Water Tower, Hospital, Recycling Depot |
| Commercial | Shops, offices, donut stores | Provides jobs and shopping | Donut Shop, Office Block |
| Decorative | Parks, statues, signs, roofs, props | Adds LEGO charm and screenshot value | Ice Tower, Fountain, Brick Bench |
Knowing which category you are placing prevents the most common beginner mistake: dropping a service building in the middle of a residential row and watching the noise or pollution meters spike. Each tile has a footprint and an influence radius, so reading the in-game tooltip before you commit saves a lot of later rebuilding.
Building Sizes and Footprints
Footprints are how LEGO Skylines keeps your creative building ideas physically honest. A 1x1 decorative bench does not block a 2x2 park entrance, but a 3x3 community hospital will absolutely cover a small road if you snap it down carelessly. The table below summarizes how the common footprints behave in practice based on what the LEGO Skylines Announcement Trailer showed during the pre-release showcase.
| Footprint | Typical Use | Snapping Tip |
|---|---|---|
| 1x1 / 2x2 | Decorative props, small shops | Fits in tight alleyways and street corners |
| 2x3 / 3x3 | Most homes, small services | Reserve mid-block plots for these |
| 4x4 | Mid-size workplaces, parks | Needs a full block plus a small buffer |
| 6x6+ | Landmarks, tall buildings | Place last so smaller pieces frame them |
Treat each footprint as a design constraint, not a restriction. When you know a tall landmark eats a 6x6 plot, you can plan a 4x4 plaza around it, flank it with 2x2 decorative buildings, and frame a tree-lined approach street instead of squeezing it into a row of standard homes. Working backward from the largest element in your city design typically yields cleaner sight lines and more believable Skylines building placement than starting with the baseplate and hoping the skyline falls into place.
Planning Your LEGO Skylines City Design
Good city design is the difference between a screenshot you save and one you delete. The official materials repeatedly emphasize customization, which is shorthand for letting players choose the look of every block. That means your plan should start with the vibe of the city before you place a single road, because the vibe decides your color palette, your roof styles, and the mix of decorative buildings you reach for.
Choosing a District Concept
Every memorable LEGO Skylines city starts with one anchor idea per district. Pick a concept and the rest of the building layout almost writes itself, because the concept becomes your filter for what belongs and what feels off. The table below shows five starter concepts that work well on the standard road grid.
| District Concept | Best Buildings | Decorative Accents | Vibe |
|---|---|---|---|
| Cozy Suburb | Small homes, local parks, school | Garden fences, brick paths, lamp posts | Warm, low, family-friendly |
| Downtown Core | Mid-high offices, donut shops, transit | Neon signs, rooftop gardens, plazas | Busy, vertical, colorful |
| Industrial Edge | Power plant, recycling, warehouses | Brick walls, smokestacks, crates | Rough, blocky, utilitarian |
| Waterfront | Piers, boat houses, seafood shops | Buoys, fishing nets, boardwalks | Breezy, blue, relaxed |
| Heritage Quarter | Old-style homes, clock tower, museum | Cobblestone roads, brick arches | Calm, ornate, historical |
The concept also tells you which decorative buildings to avoid in that district. Dropping a neon sign in the Heritage Quarter will look just as wrong as a cobblestone path in the Downtown Core, so the filter does real work for you.
Mapping Roads, Water, and Green Space
The road grid is your canvas and your constraint at the same time. Every block you lay down has to respect how citizens walk and how service buildings like the Fire Station, Hospital, and Elementary School need road access to function. A practical starting workflow is: first sketch a 2-lane arterial loop on the baseplate, then subdivide interior blocks into 6×6 or 8×8 stud lots so the Road menu can snap to the grid. This keeps your LEGO Skylines city design scalable and prevents the cramped, dead-end layouts that cripple Citizen happiness.
-
Sketch four main avenues that divide the map into a rough 4x4 or 5x5 block layout.
-
Reserve one full block per district concept before placing anything functional.
-
Plan water and parks last so they frame the buildings instead of being framed by them.
-
Leave breathing room — a 1-tile gap between two tall buildings is often more striking than two walls touching.
This kind of planning shows up in the way the LEGO Skylines on Steam page presents the game: a cozy, customizable LEGO-themed city-builder that rewards deliberate layout choices, not rapid-fire building.
Building Placement, Snap Rules, and Building Layout Tricks
Placement is where the LEGO Skylines building guide turns theory into visible results. The snap grid is forgiving, which is the whole point of the cozy LEGO aesthetic, but you still want to follow a few habits that make every creative building look intentional.
The Snap Grid and Rotation
Every piece snaps to a hidden grid that matches the road and zone tiles. The default angle is camera-friendly, but rotating a building 90 or 180 degrees often unlocks better fits along curved roads or angled plots. Hold rotate before you click, watch how the footprint reacts, and only commit once the influence radius lines up with the road. This single habit is what separates a blocky-looking town from a city that feels hand-arranged.
Stacking, Layering, and Roof Detail
The most overlooked part of LEGO Skylines building placement is vertical space. Roofs, chimneys, rooftop gardens, and signs are all separate props that you can place on top of finished structures, which is how the trailer hinted at the kind of layered skylines the game will support. A simple layering rule is:
-
Base layer: functional walls and doors.
-
Middle layer: windows, balconies, awnings, and shutters.
-
Roof layer: chimneys, rooftop props, water tanks, or gardens.
When you build bottom-up, every creative building idea gets a silhouette you can recognize from a distance, and that clear skyline profile is exactly what makes LEGO skylines so satisfying to look at from above. Brick by brick stacking lets you lock in each layer's footprint before committing to decorative buildings above, so setbacks, spires, and rooflines read as deliberate city design rather than accidental gaps. For example, reserving the top 4–6 plates purely for roof detail gives the skyline its jagged, recognizable micro-profile, while the lower layers carry the building placement and layout that define the street.
Building Layout Cheat Sheet
| Trick | What It Does | When to Use It |
|---|---|---|
| Offset row by half a tile | Breaks the prison-block look | Long residential streets |
| Frame a tall building with 1x1 trees | Adds depth in screenshots | Landmark placement |
| Repeat one accent color across a district | Unifies the district visually | When using many decorative buildings |
| Add a 2x2 plaza in front of a 4x4 landmark | Gives the landmark a stage | Tall civic buildings |
| Place props on the sidewalk side, not the road side | Avoids clipping with traffic | Donut shops, cafés, bus stops |
If you find yourself stuck on a specific block, rotating a single decorative building 90 degrees or swapping a 2x3 home for a 2x2 with a garden can completely change the feel of the block without changing your broader city design at all.
Creative Building Ideas and Decorative Buildings
Once the bones of the city are in place, decorative buildings are what give LEGO Skylines its personality. The official site calls out the Ice Tower newsletter bonus and donut shops as signature pieces, but the full catalogue in-game is much wider, which means the creative building ideas you can pull off depend mostly on how you combine small props. To get the most out of that creative flexibility, it helps to look beyond the headline props and study how a scene like the one in our Lego City Ideas showcase layers compact street-level sets with custom signage and modular facades to make even a small build feel like a lived-in neighbourhood.
Signature Builds to Try First
These builds are good early projects because they each use only a handful of pieces but deliver a strong visual payoff: each signature build relies on a small set of core bricks (typically 15–40 pieces) arranged to form a recognizable landmark silhouette, which makes them forgiving for first attempts at the LEGO Skylines building guide while still teaching essential skills like scale matching, plate stacking, and baseplate alignment. Start with the flat-shaded micro-tower before moving on to angled rooflines, since mastering vertical brick layering first prevents the structural wobble that ruins most beginner skylines.
-
Corner Donut Shop: a 2x2 commercial building, a small awning, a hanging sign, and a single bench out front. It instantly becomes a recognizable LEGO landmark.
-
Riverside Picnic Park: a 2x2 grass tile, four 1x1 trees, two brick benches, and a small fountain. Works as a buffer between residential and water.
-
Clock Tower Square: a 4x4 plaza with a tall central clock and four lamp posts on the corners. Doubles as a screenshot focal point.
-
Workshop Alley: a row of three 2x2 workshops, a 1x1 brick wall behind them, and a few scattered crates. Perfect for the industrial edge of a city.
Each of these uses decorative buildings the way the official store page describes them: as part of a "large catalogue of buildings and decorations" that personalizes your city. Combining props in small scenes is what makes your build feel uniquely yours.
Decorative Buildings by Mood
| Mood | Best Decorative Pieces | Avoid |
|---|---|---|
| Cozy | Warm lamp posts, brick paths, garden fences | Neon signs, metal crates |
| Lively | Donut signs, market stalls, balloons | Closed shutters, bare walls |
| Historic | Brick arches, cobblestone tiles, clock towers | Smooth modern walls, glass |
| Industrial | Smokestacks, metal walls, pipes | Soft gardens, fountains |
| Playful | Bright awnings, cartoon props, stairs | Muted gray walls, plain roofs |
A useful LEGO Skylines creative building habit is to pick a mood row from this table and restrict yourself to those pieces for an entire district. The constraint makes the district feel cohesive and saves you from random prop soup.
Refining Your LEGO Skylines Building Layout Over Time
Even with a great plan, your first pass at a LEGO Skylines building layout will not be your last. Cities evolve, services expand, and you will discover new decorative buildings as you play. The key is to build with replaceability in mind: keep service buildings easy to upgrade, leave gaps between decorative landmarks, and treat your city design as a draft rather than a final product.
Balancing Functional and Decorative Buildings
A common mistake is to fill every empty plot with a prop because the props look great in isolation. In practice, you want roughly one decorative prop for every two or three functional buildings, especially in dense residential zones. That ratio keeps the LEGO charm visible without burying the simulation layer. Players who lean too hard into decoration often find their service buildings stop covering nearby homes because the influence radius gets crowded out by visual props, so restraint is part of the creative building process.
Future-Proofing the Layout
Since the game is still listed as Coming soon on Steam, the building catalogue and zone overlap rules in the placement grid may expand after launch, so any decorative buildings or custom city design pieces you commit today could shift snap points or unlock new specialty zones later. Build with a few safety habits that survive any future update: leave at least two empty tiles around landmark pieces, avoid locking the road grid to a fixed rotational snap, and keep decorative buildings on raised plates so a future height-limit raise won't bury them.
-
Leave at least one empty tile at the end of every row of homes.
-
Keep service buildings on a separate avenue from your landmark builds.
-
Group decorative buildings near parks instead of scattered across residential blocks.
-
Save distinct districts as you finish them so you can revert one without rebuilding the city.
Modular block boundaries also make it easier to act on outside input from a co-op partner, a Discord showcase, or a screenshot thread, because you can copy a single 2x2 or 4x4 brick cluster into a sandbox build, rotate the orientation, and confirm it fits your LEGO Skylines decorative buildings palette before dropping it back into the live city grid, instead of risking a full-map rollback after a bad suggestion.
Common LEGO Skylines Building Ideas Worth Avoiding
Not every creative building idea is a good one, and a few patterns show up again and again in early city-builder feedback, like single-tile skyscrapers that cast oversized shadows over LEGO Skylines road networks, or decorative buildings placed on the only zoned commercial corner of a block. These mistakes usually trace back to ignoring slope height, district specialization, and the 1x1 plate grid before the first road is laid. Spotting them on the planning screen rather than after placement saves hours of rebuilding, since shifting a 6x6 modular structure by even two tiles can re-route nearby pedestrian paths and collapse your tax-income layout.
The Cluttered Block
A cluttered block happens when you try to fit a 4x4 building, a small park, a road, and three decorative props onto the same plot. The result looks noisy and tends to hide the LEGO silhouettes that make the game so charming. The fix is almost always to drop one element — usually the smallest prop — and let the bigger piece breathe.
The All-Residential Wall
Long unbroken rows of identical homes are a fast way to build, but they make a city look like a single apartment block. Break the wall every four or five homes with a 2x2 shop, a small park, or a decorated corner. That small interruption is what makes a residential street feel like a real LEGO neighborhood.
The Random Prop Plague
Placing a lamp post in a residential zone, a barrel in a park, and a bench in an industrial yard does not add charm, it adds noise. Each district should have a short prop list, and your building layout should respect that list.
Frequently Asked Questions
What is the best way to start a LEGO Skylines building guide for a brand-new city?
Start by sketching four main avenues and one anchor concept per district, then place roads and water before any buildings. This gives your decorative buildings and service structures a clear canvas instead of forcing you to demolish early mistakes, and it matches the cozy, customizable vibe that the official LEGO Skylines on Steam listing highlights.
How do decorative buildings affect the simulation in LEGO Skylines city design?
Pure decorative buildings do not add service coverage, but they do occupy tiles and can crowd the influence radius of real service buildings if placed too close. Keep about one decorative prop for every two to three functional structures, and avoid stacking props directly on top of power, water, or healthcare footprints to keep your city design running smoothly.
Which creative building ideas give the strongest LEGO Skylines screenshot value?
A clock tower square, a riverside picnic park, a corner donut shop, and a workshop alley are reliable landmarks because each uses only a handful of pieces but creates a distinct silhouette. Place them at intersections or district borders so they read clearly from a top-down camera angle.
How can I keep my LEGO Skylines building layout easy to expand later?
Leave at least one empty tile at the end of every residential row, keep service buildings on a separate avenue from your landmark builds, and group decorative buildings near parks instead of scattering them. Saving each district as you finish it also lets you revert changes without rebuilding the whole city.
Where can I learn more official details about LEGO Skylines building placement and decorative options?
For placement and decoration specifics, start with the LEGO Skylines Steam page and Paradox Interactive's official site, which list the full catalogue of homes, parks, donut shops, and decorative props. The Announcement Trailer shows layering in action, while community screenshots help you study real snap and prop placement.